Monday, November 24, 2014

Introduction to HTML

An intro to HTML

What is HTML?

HTML stands for HyperText Markup Language. HTML is used on the web in order to "markup", or format, pieces of text. Instead of being plain-text, this allows the text to be in italics, bold, and have all other cool stuff. In this lesson I will talk about the basics as well some useful sources of information about HTML

To create and run HTML files, open up a text editor (such as notepad) and enter all the HTML. When you are done, click save as and put: exampleFileName.html

When you run the HTML file, it should open up in your browser.

HTML: All about those tags

In HTML text is formatted by enclosing the text in tags. For example, <h1> is a type of tag. Most tags have a beginning and end tag. The beginning tag is <x> where x is the name of the tag and the closing tag is formatted like: </x>

So, for example, let's say we had a normal piece of text like 
Hello, World!

Not so interesting, is it? But... if we surround it with the tag <i> it will be in italics.

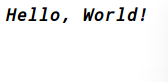
<i>Hello, World!</i> when run in your browser looks like: 

Now, what about making the text bold? Too easy! Just surround the text with the <b> tag!

<b>Hello, world</b> when run in your browser looks like:


What if we want to make the text both bold and italicized? We can combine tags to do that!

For example:

<b><i>Hello, World!</i></b>

Will give you:

Cool!

More Info


If you want more information about other kinds of tags in HTML as well as more in-depth tutorials, you can go to these links:

HTML dog

HTML Tags List

Code Academy HTML tutorial

Sunday, October 19, 2014

Intro to Python: Getting input

Intro to Python: Basic input

In my previous tutorial, I went over how to print out basic texts to the terminal. That's all fun and games, but what if we also want to receive input from the user as well? Let's say, for the sake of example, that we are making a text-based RPG and we wish to have the player enter a name for our hero. This is done in python by using a method called raw_input().

To use our previous example, one thing I could do is this:

print("What is your name?")
name = raw_input() 

Now, when we run this program in the codeacademy labs, we should get this as the output:

Code Explanation


 As you can see, I got the output "What is your name?". On a new line, I inputted the name. I used my name Chris here as an example, but you can put in whatever name you want.

Now, let's go through the code each line.

print("What is your name?")

This line will output the text "What is your name?" to the screen. 

name = raw_input()  

This line is getting input from the user. You may have noticed that I am making a variable called name and assigning it to the input. Don't worry about that too much right now, just know that now the variable name is equal to whatever input I got from the user. 

 String Concatenation

I can add an extra line of code such as

print("Hello " + name + "!")  

to the end of the code. Now, when I run the program I get this output:


 In the last line of code, what I did is concatenate the strings with a variable. This sounds complicated, but it's actually very simple. Concatenation just means you are adding to things together. In this case, I am adding the strings together.

To give another example of this, I could do something like:

print("Hello " + "World" + "!")  

This will give me the output:


See? Simple! Try getting the input from the user with new variables now to see if you fully understand. If the program doesn't run correctly the first time, don't worry. Just double check your program to see if there are any simple mistakes. If you still can't get it, reread this tutorial or find other examples of code online to help you.

In my next tutorial, I will be going over if and else statements and using them with variables.


Thursday, October 16, 2014

Introduction to Python

An intro to the Python programming language

What is Python?

The Python programming language is a general programming language that can be used for many different purposes. Unlike C++ or Java, python is quick to set up and useful for teaching neophytes how to program. Python emphasizes readability instead of terseness. So, how exactly can we run a Python program?

Running a Python program

You can do one of two things: Download a python interpreter or use an online python interpreter. If you wish to do the former, you are on your own. However, if you want to do the latter then you can use Code Academy labs to run your python programs.

http://labs.codecademy.com

Click on the link above and select python. You should get a screen that looks something like this


Printing strings to the terminal

Now, the most basic program that we can create is a "Hello World"
type program. Now, on the left side of the screen put the following code:

print("Hello, World!")

Then click run. You should get the words Hello, World! on the right side of the screen.

In my next tutorial I will talk about how to get basic input from the user.


Saturday, October 11, 2014

LaTeX: Lists

Lists

In my last tutorial, I stated that I would go over lists in LaTeX. Well, here is how to create lists in LaTeX!

Bullet Points

Making bullet points in LaTeX is very simple. Within the \begin{document} and \end{document}, put \begin{itemize}. Texmaker should auto complete that to add \end{itemize} as well. Now, in between itemize put in \item and add whatever you with to put in bullet points. For example, 

Variable Types
\begin{itemize}
\item float
\item boolean
\item char
\item double
\end{itemize}

This will produce:


 This is fine if we want only one level, but what if we want sub-points? This is done by adding another {itemize}. If we were to categorize variable types by whether they deal with numbers, letters, or other we could do this:

 
Variable Types
\begin{itemize}
    \item Numbers
    \begin{itemize}
        \item byte
        \item integer
        \item decimals
        \begin{itemize}
            \item float
            \item double       
        \end{itemize}
    \end{itemize}
    \item Letters
    \begin{itemize}
        \item char
        \item string
    \end{itemize}
    \item Truth values
    \begin{itemize}
        \item boolean
    \end{itemize}
\end{itemize}
\end{document}

This code will produce the result:

 
 Let's say, however, that you want to make numbered lists. 

Numbered Lists


Creating numbered lists is similar to creating lists with bullet points in the sense that they both use \begin and \end. However, while lists with bullet points use {itemize}, numbered lists use {enumerate} 
Let's say, for the sake of example, I wanted to create a list of programming languages I am proficient in on a resume. I could do this:

 Programming Languages
\begin{enumerate}
    \item Python
    \item Ruby
    \item C++
    \item Objective-C
    \item Java
\end{enumerate} 


Giving me the output:


Lastly, we can combine both numbers and bullet points by inserting the \begin{enumerate} within a \begin{itemize}

Going back to the example I had before, assuming that I wanted to separate these programming languages by bullet points I could do:

\begin{itemize}

\item Scripting Languages
    \begin{enumerate}      
    \item Python
    \item Ruby
    \end{enumerate}
\item Compiled Languages
    \begin{enumerate}
    \item C++
    \item Objective-C
    \item Java
    \end{enumerate} 

\end{itemize}


This will end up giving us the output:


That's the end of today's lesson. In the next lesson, I will go over how to set up a TeX document for a lab report. 

Friday, September 26, 2014

Starting out in LaTeX

Part 1

Now that we have texmaker on our computer, we can begin to create Tex documents!

Today I am going to introduce to you to a basic "Hello World" type program that will show you basic concepts in TeX. 

Open up texmaker. When you open it up, you should see something like this:

To create a new file you can do one of two things:
  • Go to File -> New
  • Ctrl + n
Once you have created a file, type in the following code into the right window:

\documentclass[12pt]{article}
\begin{document}
Hello, \emph{World}!
\end{document}


Now, save the file wherever you want and then go to Tools -> PDFLaTeX. This will convert the file into a PDF file so that other computers can see it. Go into the folder where you saved the TeX file, and you should find a PDF there. When you open it, it should look something like this:


As you can see, we now have a PDF that shows the words "Hello, World!" but...

How does this code work exactly?

Code explanation

The line \documentclass[12pt]{article} declares what type of document type it will be. Here, the document type is being declared as an article. This line also shows what the font size will be. This line makes the font size 12pt font, but we can edit this to be either 10, 11, or 12. So I could have written:

\documentclass[10pt]{article}

\begin{document} and \end{document} should be fairly self explanatory. We are designating the beginning and the end of the document. Anything within these two lines will be put into the document. 

Hello, \emph{World}!

Here, we are putting Hello, World! in the PDF.

The portion that should be noted here is \emph{World}! 
  
As you may have guessed, \emph is short for emphasis. Anything between the braces will be emphasized. In other words, they will be italicized. However, this is not the only way to italicize text. Text can also be italicized by using \textit{} where, again, everything between the braces are italicized. 


Hopefully you learned some more about LaTeX. In my next tutorial, I will go over how to make lists in LaTeX as well as basic formatting. The next tutorial will be longer than this, so it will be up by Sunday night. 

Thanks for reading. If you liked this tutorial, make sure to share this blog with others. 


Thursday, September 25, 2014

Installing LaTeX

Installing LaTeX

What is LaTeX?


Before I begin about how to install LaTeX and setting it up, it would be best to go over what LaTeX is exactly. TeX is a typesetting system that was first created by Donald Knuth. TeX is extremely powerful in that it allows fine-grain customization but, as a result, it was also rather cumbersome to use. This is where LaTeX comes in. LaTeX is essentially an extension of TeX.

Installing LaTeX


Now that we know a little bit about LaTeX, let's begin the installation process. I am using a Linux system (Ubuntu specifically) and so the installation process may be different for you if you are using a computer with Mac OS X or Windows. You will have to look up how to install the following software that I will be using in my tutorials:
  • LaTeX
  • Texmaker

However, if you are using Ubuntu, all you need to do is simply open a terminal and enter the following commands:

sudo apt-get update

sudo apt-get install texlive-full

Once you have entered those commands, you should have LaTeX completely installed on your system. Now let's install texmaker, which was made specifically for creating and editing TeX documents.

So, in your terminal enter:

sudo apt-get install texmaker  

And you will now have texmaker on your computer.


In my next post, I will go over some basic things that you can do with LaTeX as well as making a "Hello World" file for LaTeX.